If you’ve been hunting for the best way to use a pin light in your home, studio, or storefront, you’re not alone. The phrase “pin light” gets tossed around a lot—and it can mean different things depending on where you live and what you’re building. Are we talking compact recessed spots for accent lighting? Two‑pin and four‑pin bulbs? Even connectors for e‑bike lights? This guide clears it all up so you can choose, install, and maintain the right solution with confidence.
You’ll find practical guidance, real‑world examples, and 2025‑ready checklists—plus tips on everything from a 2 pin light bulb and a 4 pin light bulb to niche topics like a 5 pin e‑bike light connector. Let’s make your lighting plan cleaner, brighter, and easier to live with.
What exactly is a “pin light”?
“Pin light” is used in three common ways:
- Architectural: Small recessed or surface‑mounted accent fixtures (often called mini downlights or “pinlights”) that create precise beams for art, shelving, or task zones.
- Lamp bases: Bulbs with pin bases (two‑pin, four‑pin) such as MR16 (GU5.3), G4/G9 capsule LEDs, and plug‑in CFL/LED replacements.
- Connectors: Multi‑pin plugs used in low‑voltage lighting systems (and in niches like e‑bike lighting harnesses).
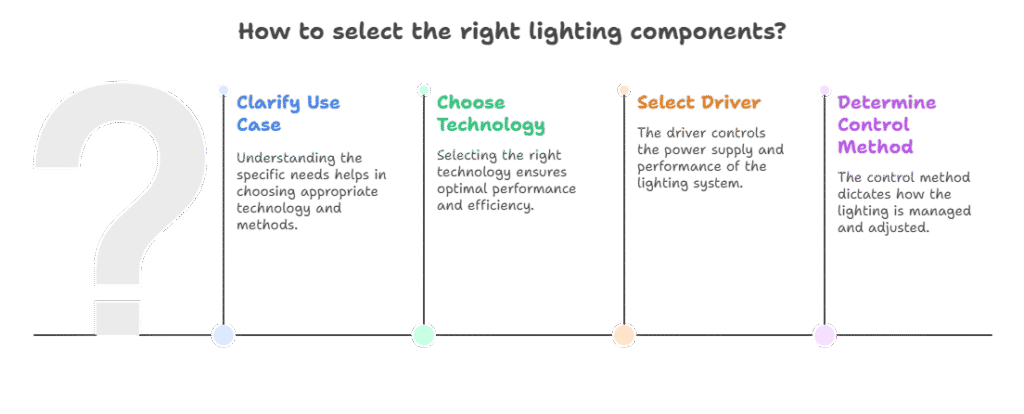
Because the term spans fixtures, bulbs, and connectors, the smartest first step is clarifying your use case. Once you know that, you can pick the right technology, driver, and control method.
Why use a pin light at all?
- Precision: Tight beams (10°–30°) and gimbal options highlight art, signage, or products.
- Minimalism: Tiny trims, canless bodies, and trimless installs keep ceilings clean.
- Efficiency: Modern LEDs deliver 80–130 lm/W with 90+ CRI common in 2025.
- Comfort: Dim‑to‑warm and tunable white models adapt to mood and time of day.
Pro tip: For accenting artwork, aim fixtures at ~30° to reduce glare and frame shadows.
Quick reference: choose your pin light like a pro
- Purpose: Accent (tight beam), task (medium beam), ambient fill (wide beam).
- Output: 250–800 lumens for accents; 800–1500 lumens for task.
- CCT: 2700–3000K for living; 3500–4000K for workspaces; tune if you can.
- CRI: 90+ for color‑critical spaces; 95+ for galleries/retail.
- Beam: 10–15° (art), 24–36° (shelves/counters), 60°+ (fill).
- Dimming: TRIAC for retrofit; 0–10V/DALI/Matter‑over‑Thread for new.
- Ratings: IC/AT for insulated ceilings; Damp/Wet where needed.
- Controls: Scenes, occupancy, daylighting, voice/app integrations.
Pina light: style, not just function
You might see “pina light” in catalogs or inspiration boards. It’s often a style cue—think airy, woven, or tropical‑inspired pendants—or a brand/collection name. Designers mix a minimalist ceiling pin light with a statement “pina light” pendant to layer task plus ambiance. The hybrid look: precision from above, personality from the pendant.
- Use case: Dining tables and kitchen islands—pendant for glow, pinlights for sparkle on place settings or art.
- Tip: Keep pendant dimmer than accent pinlights if you want the tableware to pop.
Pine Knob lights: lessons from venues and public spaces
Large venues (think the Pine Knob Music Theatre) are masterclasses in wayfinding and ambiance. “Pine Knob lights” often refers to pathway, canopy, and stage‑adjacent lighting—durable, glare‑controlled, and extremely consistent.
Borrow these principles at home or retail:
- Layering: Soft ambient wash + narrow accents for focal points.
- Glare control: Baffles and louvers on small fixtures keep sightlines clean.
- Durability: Exterior‑rated housings and sealed trims for porches and patios.
Pin‑based bulbs 101: 2‑pin vs. 4‑pin, plus today’s LED swaps
Pin‑base bulbs are ubiquitous in accent fixtures, under‑cabinets, and older CFL downlights. Here’s how to tell them apart—and upgrade without headaches.
2 pin light bulb: common types
- GU5.3 (MR16, 12V): Two straight pins, often in recessed accents, under‑cabinet pucks, or track. Now mostly LED.
- G4 (12V) and G9 (120V): Tiny capsule lamps for decorative and task fixtures.
- GU10 (twist‑lock) is technically two “pins,” but it’s a bayonet twist—not a straight pin. Treat GU10 separately.
Upgrade tips:
- For MR16, match transformer type (electronic vs. magnetic). Some LED MR16s need a specific driver or a “true 12V” supply.
- Check beam and CRI; older halogens were gorgeous—choose 90–95+ CRI LEDs to maintain quality.
4 pin light bulb: common types
- G24q (plug‑in CFL): Four‑pin base; common in commercial cans and sconces.
- 2G11 (long PL‑L lamps): Four in‑line pins on one side; used in older troffers and cove lights.
Upgrade tips:
- Options are “plug‑and‑play” (keeps ballast), “ballast‑bypass” (rewire line voltage to lamp), or “hybrid.”
- Ballast‑bypass is efficient and future‑proof but requires safe rewiring—hire a licensed electrician.
The 5 pin e‑bike light connector, in plain English
If your lighting project is mobile, you may bump into a 5 pin e‑bike light connector (e.g., Higo/Julet types). These connectors typically carry power, ground, and control/signal lines between controller/displays and head/tail lamps.
- Why it matters: Polarity and pin order are critical. A wrong hookup can fry LEDs or controllers.
- What to do:
- Identify connector brand and pinout from your controller manual.
- Use waterproof quick‑disconnects to protect against the elements.
- Test voltage (often 6V DC for lights) before connecting a new lamp.
Pro safety note: If you’re not sure, don’t guess—miswiring can void warranties or cause shorts.
Planning a pin light layout (rooms, art, shelving, storefronts)
Good lighting is math plus taste. Here’s a battle‑tested approach.
Step 1: Define your focal points
- Art, product displays, countertops, reading chairs, signage.
Step 2: Choose beam angles
- 10–15° for tight highlights at 6–8 ft throw.
- 24–36° for broader accents at typical ceiling heights (8–10 ft).
- 60° for gentle wash.
Step 3: Position and aim
- Art: Mount 24–36 inches from wall, aim at ~30°.
- Shelving: Front‑of‑shelf aiming reduces glare on glossy packaging.
- Counters: Stagger beams to avoid scallops.
Step 4: Count fixtures with a quick lumen check
- Accent targets: 200–500 lux on focal points.
- Back‑solve lumens: lumens ≈ lux × area × (loss factor ~1.2–1.4).
- Example: A 2 ft × 3 ft painting (0.56 m²) at 300 lux needs ~300 × 0.56 × 1.3 ≈ 218 lumens on target. With optical losses, a 500–600‑lm pinlight at 24–36° is plenty.
Installation: canless versus cans, drivers, and safety
- Canless mini downlights: Slim, fast, and often IC/AT rated. Great for remodels with tight joists.
- Traditional cans: Still useful for rough‑in precision and swapability; trim options abound.
- Drivers: Match dimmer/driver types (TRIAC, ELV, 0–10V, DALI, Casambi, Matter). Keep drivers accessible.
Safety musts:
- Use IC/AT fixtures where insulation contacts the housing.
- Damp/Wet ratings for baths, porches, and showers.
- Follow local electrical code. When in doubt, hire a pro.
Dimming and controls in 2025: smoother and smarter
- Line‑voltage dimming (TRIAC/ELV): Good for retrofit; verify compatibility lists.
- Low‑voltage control (0–10V/DALI): Smooth and flicker‑free in commercial and high‑end residential.
- Smart ecosystems: Matter‑over‑Thread, Zigbee, and BLE mesh (Casambi). Scenes, schedules, and daylight/autodim save energy and feel luxurious.
Flicker check: For camera‑heavy spaces (content studios, retail), pick drivers with low ripple (IEEE 1789 guidance) to avoid banding on video.
Real‑life example: a three‑zone living room that finally “clicked”
“I had track heads everywhere and it always felt harsh. A designer swapped half the heads for three zones of recessed pinlights—10° for a painting, 24° for the bookshelves, 60° for gentle wash—and set up a dim‑to‑warm scene. We barely changed the total wattage, but the room looks like a magazine spread now.”
Takeaway: Precision beams plus scenes beat brute‑force brightness.
Care, cleaning, and longevity
- Dust lenses quarterly; even a thin film can cut output by 5–10%.
- Avoid harsh cleaners on trims; use microfiber and mild soap.
- Keep drivers cool; heat is the enemy of LED life (50,000–100,000 hours is realistic when ventilated).
Troubleshooting: common pin light pain points
- Buzzing when dimmed: Mismatch between dimmer and driver—swap one to a listed compatible.
- “Pink” or off‑white whites: CRI is fine but R9 is low—choose high‑R9 products for saturated reds.
- Ghosting on 0–10V off: Add a relay or ensure the driver fully powers down.
- MR16 LED flicker: Electronic transformers sometimes trip—use LED‑rated or magnetic transformers, or driver‑integrated MR16s.
Cost and ROI in 2025
- Quality recessed pinlights: $35–$150 per head depending on trim, CRI, and control.
- Drivers/dimmers: $25–$150 per zone.
- Smart controls: $50–$200 per room for hubs/dimmers.
- Energy: LEDs use ~75–85% less than halogen; savings pile up in accent‑heavy spaces like retail.
ROI factors:
- Reduced returns/complaints in retail (true color rendering).
- Higher perceived value in real estate (good lighting photographs better).
- Lower maintenance: Fewer ladder trips, longer lifespans.
Sustainability: make your lighting plan greener
- Pick replaceable light engines or serviceable fixtures where possible.
- Specify 90+ CRI at 100+ lm/W to maximize quality per watt.
- Use occupancy and daylight sensors; morning/evening scenes can cut energy use 20–40%.
- Prefer certified products (ENERGY STAR, DLC) and reputable drivers (recyclable, RoHS compliant).
Spec cheat‑sheet: compare options at a glance
| Use case | Fixture type | Lumens | Beam | CCT | CRI | Notes |
|---|---|---|---|---|---|---|
| Artwork | Gimbal pinlight | 400–800 | 10–24° | 2700–3000K | 95+ | Aim at 30°, low glare |
| Kitchen task | Recessed spot | 700–1200 | 24–36° | 3000–3500K | 90+ | Pair with under‑cabinet |
| Retail shelf | Track mini head | 600–1000 | 15–24° | 3000–3500K | 95+ | High R9 for reds |
| Ambient wash | Recessed wide | 800–1500 | 60–90° | 2700–3000K | 90+ | Fill, not glare |
| Exterior porch | Wet‑rated downlight | 600–1200 | 24–60° | 2700–3000K | 90+ | Wet/Dark‑sky min |
FAQs
How many pin lights do I need in a living room?
For accent‑forward living rooms, start with 1–2 per focal point (art, bookshelf, sculpture) plus wide‑beam fill if needed. As a rule of thumb, aim for 15–25 foot‑candles (150–250 lux) ambient and 2–3× that on focal points. Spacing often lands near 4–6 ft between fixtures at 8–9 ft ceilings, adjusted by beam angle.
Can I replace a 4 pin light bulb (plug‑in CFL) with LED?
Yes. Choose a plug‑and‑play LED (keeps the ballast) or a ballast‑bypass lamp (rewire line voltage to the socket). Ballast‑bypass is more efficient and reliable long‑term, but it requires proper rewiring by a licensed electrician. Match base type (G24q, 2G11) and check fixture clearance.
Is a 2 pin light bulb the same as GU10?
No. A GU10 is a twist‑lock bayonet with two “studs,” not straight pins. Common two‑pin bases include GU5.3 (MR16), G4, and G9. Verify your socket before buying an LED replacement
What’s the ideal beam angle for a pin light on art?
Between 10° and 24°, depending on throw distance and artwork size. Mount ~24–36 inches from the wall and aim at about 30° to minimize glare. Use 95+ CRI and strong R9 for faithful reds.
How do I wire a 5 pin e‑bike light connector safely?
Identify the connector type (e.g., Higo/Julet), consult the controller’s pinout, and confirm voltage with a multimeter (many e‑bike lights use ~6V DC). Use waterproof mating connectors and strain relief; never assume color = function. If in doubt, consult the manufacturer or a tech.
Are pin lights good for kitchens?
Absolutely. Use medium beams (24–36°) to spot islands and counters, pair with under‑cabinet strips for shadow‑free prep, and set 3000–3500K for crisp, neutral light. Add dimming for evenings.
What’s the difference between a pin light and a downlight?
“Pin light” often refers to smaller, tighter‑beam downlights (or simply to fixtures using pin‑base lamps). “Downlight” is broader—any recessed ceiling luminaire throwing light downward. In practice, pinlights are the precision tools; downlights are your generalists.
Pros and cons at a glance
| Aspect | Pros | Cons |
|---|---|---|
| Small recessed pinlights | Precise, low‑glare, minimalist | Can require careful aiming; cost per head can be higher |
| 2‑pin/4‑pin LED retrofits | Efficient, cooler, long life | Compatibility and ballast issues in older fixtures |
| Smart control (Matter/mesh) | Scenes, schedules, energy savings | Ecosystem complexity; upfront cost |
| Narrow beams (10–15°) | Show‑stopping accents | Can create hot spots if mis‑aimed |
A step‑by‑step mini plan for your next room
- List focal points and tasks (art, reading, cooking zones).
- Pick beams (tight for accents, medium for task, wide for fill).
- Choose CCT and CRI (3000K/90+ for most homes; 95+ for art and retail).
- Decide on dimming/controls (retrofit dimmer vs. smart scenes).
- Lay out fixtures (distance from wall, spacing, aim angles).
- Verify electrical (IC/AT, damp/wet, driver/dimmer compatibility).
- Order one of each and mock up (temporary mounting + dimming test).
- Install and aim; lock in scenes.
- Live with it for a week; tweak positions/levels.
- Document choices for future maintenance.
2025 trends to watch (and what to skip)
- Tunable white & dim‑to‑warm: Great for living/dining.
- Ultra‑low flicker drivers: Essential for content creators and retail.
- Interchangeable optics: Snap‑in lenses let you re‑beam without replacing heads.
- Matter‑over‑Thread: Fewer hubs, better reliability for smart scenes.
- Glare‑busting trims: Regressed optics and micro‑baffles for buttery ceilings.
- Overly bright cool white (5000–6500K) in living spaces—it feels clinical.
- Mystery LEDs without LM‑79/80 data or clear warranties.
- Ballast‑dependent retrofits when ballast is near end of life.
Final checklist before you hit “buy”
- Fixture purpose (accent, task, ambient) is clear
- Beam angle matches throw distance and target size
- Lumens, CCT, CRI (and R9) meet your quality bar
- Driver/dimmer compatibility confirmed (or smart control chosen)
- Ratings (IC/AT, Damp/Wet) match location
- Retrofit bulbs match base (2‑pin/4‑pin) and wiring approach
- Warranty and certification (UL/ETL, ENERGY STAR/DLC) checked
- Installation plan and aiming notes documented
CLICK HERE FOR MORE BLOG POSTS
Liam is a freelance writer, blogger, and digital media journalist. He has a management degree in Supply Chain & Operations Management and Marketing and boasts a wide-ranging background in digital media.